To create a test you will first need to go into the Course Curriculum tab within the teacher manager, and then select Tests.
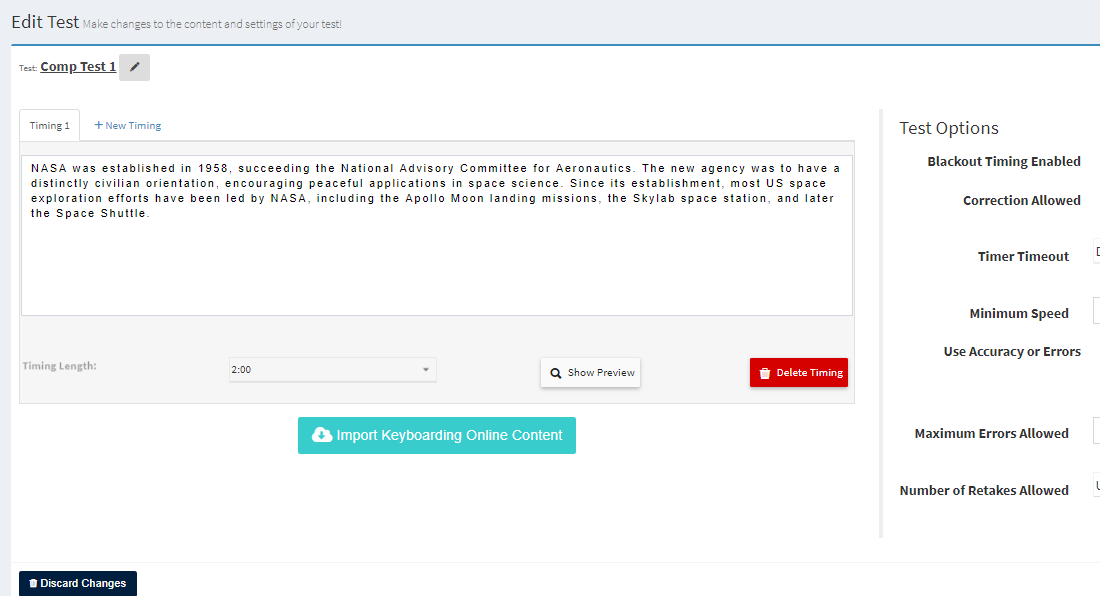
Once here you will need to select Create New Test in the top right of your screen and give it a name. Now you should see a screen like the one below.
You will notice that this screen is much like the Custom Lesson creation screen, but with a few differences. The main difference being that this Test will have its own set of standards which it will be graded on. This will allow you to create tests that are either easier or harder than the main lessons.
Adding Test Content
We allow you to add content to type from any source, and there is no limit as to how much you add to the test.
To add your test content delete or erase the Sample Text that appears within the text box. From here you may begin by typing or pasting content from another source.
Please note that if you copy a paragraph from the web, you will want to Paste as plain text this will omit any special characters that could cause an error in the test.
In my example below, I have set this to a two minute timing. We allow you to create :15, :30, 1, 2, 3, 4, and 5 minute timings. What this means is that the students must type for the entire time, if they stop after they have typed the paragraph their wpm score will drop significantly, and if enabled in a later step they will activate the Timer Timeout which will force them to start the timing over again.
Customizing Test Options
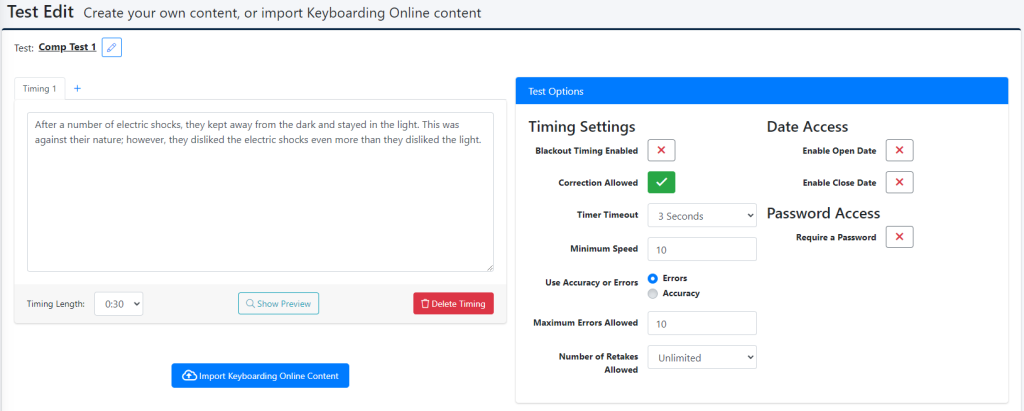
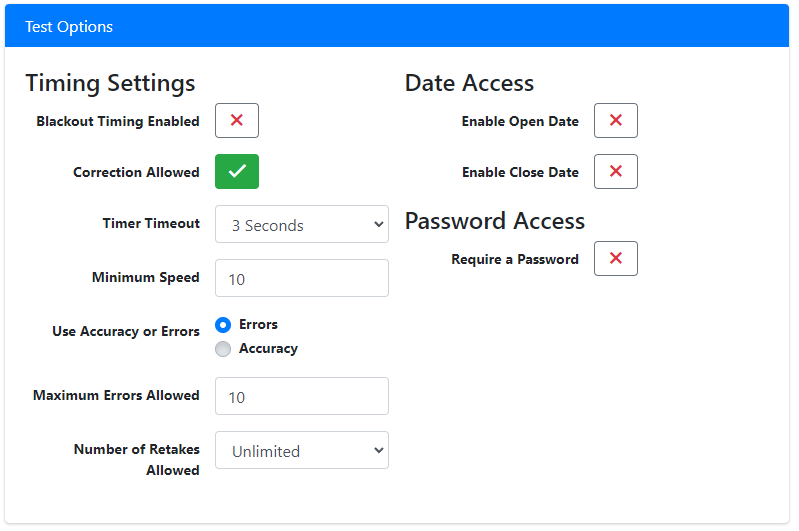
The Test Options are where we will be able to modify the minimum requirements that the students must meet in order for their wpm score to save and be applied to their grade.
The Blackout Timing Enabled check box will prevent the students from seeing what they are currently typing. They will still be able to see the test, just not their progress. This is one of our patented techniques to help break the Hunting and Pecking Cycle.
Correction Allowed When this box is checked students are able to use backspace, delete, and the arrow keys to fix mistakes that they have made within the test.
Timer Timeout Is another one of our patented techniques that helps to break the hunting and pecking cycle. With it enabled students will need to keep a constant typing rhythm to type. If the student stops typing for a period of time (we recommend 3 seconds) it will wipe their progress from the current timing.
Minimum Speed is the WPM speed that the students must meet on their timing in order for their score to save to their account, if they do not meet the score they will need to re-take the test in order for their score to count towards their grade.
Use Accuracy or Errors will allow you to set if the student must meet an Accuracy requirement or they must be at or below the number of errors which are allowed. Typically we recommend allowing 1 error for every 30 second of typing.
Number of Retakes Allowed indicates the number of times a student is allowed to try and get a better WPM score. With it disabled, a student will only be allowed to take the test once. This doesn’t include a student who didn’t meet the minimum requirements. One score that saves to the server counts as one attempt.
Date Access will allow you to set the dates in which your students are able to access the test. We allow you to open the test up for a couple hours or even over a month.
Password Access will allow you to lock your test behind a password, that way you are able to allow students in to the test as you feel they are ready.
After you have set the settings to your liking, click the green Save button.
Assigning the Test to Your Students
To assign the test to your students click on Grading Profiles and then Double Click on the grading profile which your students are assigned to.
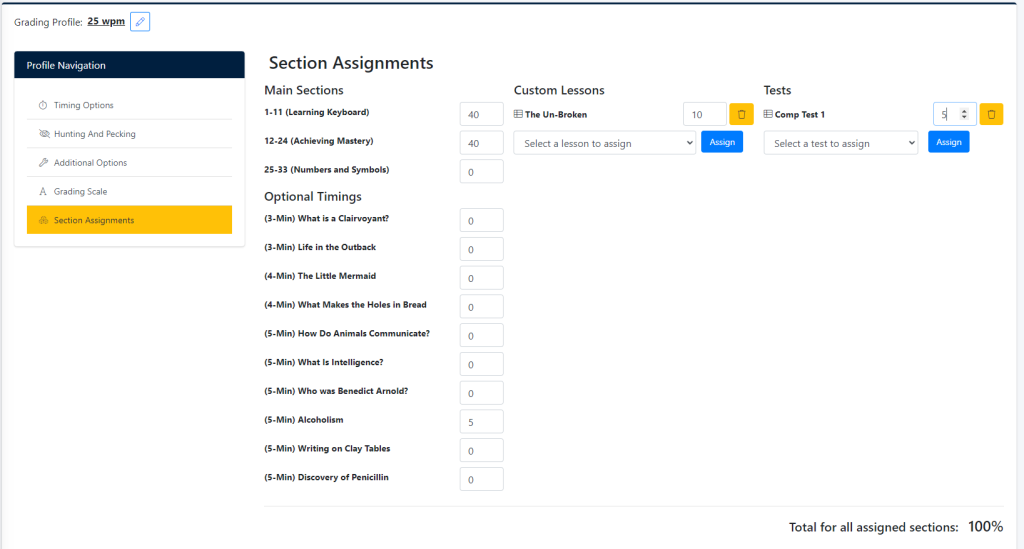
Once here, select Section Assignments and on the right side of the screen you will see Tests and a Drop down box. Click on the box and then select your test and then select Assign.
After you assign it you will see that there is a 0 next to the test. This number slot indicates the Section Weight which will be applied to their final grade. If you leave it at 0, it will neither hurt nor help their final grade. Once you set the grade weight, go ahead and select the green Save button on the bottom right of the screen.
Your students now have access to their first test!